Sunday, November 30, 2008

My Sewing Room is Out of Action


Well, my sewing room is out of action today!

Good news is that I picked up most of the components of a new sewing table-work table on Freecycle. All except one piece of the frame and the legs. And it's a current item at Ikea, so the parts should be available.

More good news: a friend of mine was keen to have the stuff I needed to get rid of out of my sewing room to make room for the new stuff . . . and she could pick it up today. So I spent the morning moving and dismantling stuff. All good so far.

Now for the not so good news, Ikea had everything in stock, except the one piece of frame I need to hold the whole thing together. That one piece is out of stock. Correction! It's not really out of stock, but it's stored somewhere that can't be accessed without a fork lift. Of course the fork lifts come in after the store closes and no, I couldn't pay for the item and wait until closing time to get it. I did ask. So I'll have to go back tomorrow to pick up that one part. Then I can put my sewing room back together again.

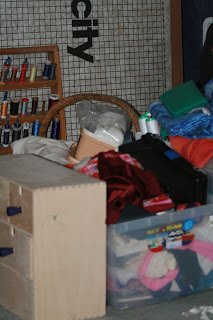
Right now my sewing room looks terrible. But I'm looking forward to how it's going to look in a few days.

Saturday, November 29, 2008

Getting Used to the Sewing Machine

If you haven't done much sewing before it's worth taking some time to get used to the machine. The sewing machine manual can be a bit intimidating, but it has all the information you need to use the machine well. First look for a picture which identifies all the parts of the machine.

Before you thread up the machine have a go at sewing along some lines on a piece of scrap paper. Draw yourself some straight lines, some corners and some curved lines. Put the paper under the presser foot, lower the presser foot and go. You need to get a feel for how hard to press on the foot pedal to get a steady pace and also get a feel for "steering".

The feed dog is the little mechanism just under where you sew. It actually grips the fabric (paper for now) and pushes it along. So you don't need to grip and push while you're sewing. Just steer gently. Take another piece of paper and see what happens if you let go after you've started sewing. You should find that the machine keeps a reasonably straight line without any help at all.

To turn a corner, leave the needle right down, lift the presser foot, turn, put the presser foot back down and keep sewing. The needle will hold everything in place while you turn the corner.

Next, practice threading up the machine. There will be a diagram in the machine's manual. You will need to wind yourself a bobbin, so do that first. The bobbin holds the thread for the underneath part of the stitch.

Now have a go at sewing some random lines on a piece of scrap fabric. Fold the fabric over and see how it feels to sew a real seam. On most machines you need to hold the two threads firmly behind the presser foot for the first couple of stitches. You know that the sewing machine will hold a steady course, even if you don't steer it for few seconds, so you don't need both hands on the fabric all the time.

Friday, November 28, 2008

My Sewing Machine


The sewing machine I use for most of my work is an old Elna. A Contessa 450 to be exact. I bought it from a garage sale for $20! OK, so I've spent a lot more than that maintaining it over the years, but a newer machine would need at least as much maintenance. I like the fact that it's a solid old thing. It's mechanism is simple enough that I have at least a begin to understand how it works. I recently found a sewing machine mechanic who likes and admires these old machines and now it just purrs along. It has more stitches than I'm ever likely to use.


As for stitches I regularly use my straight stitch--for just about everything. The reverse option is for securing the ends of seams. That's very handy, but not essential. You can tie them off instead. I also use the zig-zag stitch a bit. That's about it really.

My first sewing machine--I still LOVE it--is an old old Singer. It has only one stitch: straight, forward. That's it! It's a perfect little stitch and it stitches through anything. It would take a bit longer, but I could make most of my projects using only that machine.


What do I recommend as a sewing machine for a beginner. Well, something like what I've got, if you can get it . . . old and reliable. You might be able to borrow one from a friend. If you buy a new machine you'll be spending at least a couple of hundred dollars. I don't think the really cheap little machines that are sometime sold for under $100 are worth having.

The sewing machine manual is a must have. It will show you where the machine needs to be oiled and how to thread it up. It's worth getting the machine serviced before you use it.

If you want to have fun and get a good result sewing, make sure your machine is happy.

Thursday, November 27, 2008

Confessions

My computer lives in a little nook in my sewing room. It was out of action most of the day yesterday. A friend came to help me by checking it, cleaning it up and get it going better. That involved lots of technical stuff that I don't fully understand. While she fixed the computer, I tidied up a bit in the sewing room . . .

I came across a shelf of last summer's unfinished sewing projects. Uh oh! and Yay!


  • One light cotton princess-line top: I wasn't too happy with how it fit last year and I was going to tweek it, but when I tried it on yesterday I decided it would do. I wore it for the rest of the day:)

  • Three, yep, 1, 2, 3, pairs of long-shorts in different stages of completion. Two needed the length to be adjusted and one needed to be put together--it had been cut out and abandoned. I finished them all off, wore one pair and tossed the others in my room. Note to self: I don't need any more summer pants for a while.

  • Two rash vests cut out, but not sewn at all. These were for friends in Queensland, where rash vests are a consumable--they spend a lot of time in the pool over Christmas. Of course the girls have grown in the last year, so I have to check if they're still going to fit.

  • Two singlet tops for me--also cut out and ready to sew. I started putting one of them together in the afternoon and hope to finish it off today.

Moral of the story . . . it would have been a good idea to check that shelf before I went shopping for summer fabrics last week. . . . I guess I must have been pretty ambitious--or desperate--when I cut out sooooo many garments and then didn't finish them.


Now I have a clear shelf ready to receive new projects and a few more things to wear. Also a couple of "works in progress" to get on with.


Wednesday, November 26, 2008

Scissors

Aaaaah Scissors! I have them all over the house, maybe not quite one for each of my projects, but close. Alright, I'm a bit over the top about scissors. What do I think you really need?

You need a pair of dressmaking scissor that are used only to cut fabric. They don't have to be fancy or expensive. But they must be reserved for this use only. Paper makes dressmaking scissors blunt. Blunt scissors chew through fabric instead of cutting cleanly through. Chewing through fabric is no fun.

It's also nice to have a little pair of thread-snips. I have a pair attached to my sewing machine with a long ribbon. I use them to snip off the ends of threads at the start and end of seams.

Tuesday, November 25, 2008

Fabrics

Here is a sampling of some of the fabrics floating around in my sewing room today. The bright blue in the top right corner is a striped cotton voile and the floral on the left is a plain weave print. I'm planning to sew myself some summer tops out of these two. I'll obviously have to give them a bit of a press before I cut them out. I love wearing cotton and I don't normally iron my clothes, but it's nice to get rid of any wrinkles which might make cutting out less accurate.

Getting Started

To get started sewing you will need:
  • fabric
  • tape measure
  • scissors
  • pins
  • a pin-cushion is nice--it's an easy first thing to sew if you don't have one
  • a flat space to lay out fabric
  • thread
  • sewing machine with its manual
  • pattern
  • a bit of time to play and learn
  • pencil to mark your pattern
  • notebook and pen to keep track of what you're doing