- Starting with what's not going to change--I'm going to stick to the elastic casing idea at the waistline I'll still need the extra fabric to fold over to form the casing at the top.
- The key measurements of waist, hip (widest point) and distance between those two is still relevant and the amount of ease is going to need to be about the same.
- For the skirt, I used the same pattern piece for both the front and back. The front and back of the shorts are NOT the same. The back will have to be a bit bigger than the front, so there's at least two pattern pieces to start with.
- For the skirt the centre front (and back) were straight lines, so I could draw out half the pattern and place the centre line on the fold to get a mirror image for the other half. The shorts are still symmetrical--right and left sides are a mirror image of each other--but the pattern has to wrap around to cover the inside legs, rather than just sit flat at the front. The pattern pieces will have to have a curve to cover the crotch area.
All of this means that it's either time to get hold of a pattern or put in a bit more time and effort to draw up a personalised pattern. I found this free lesson on making your own shorts pattern: http://www.patternsthatfityou.com/frshortscl.htm. I haven't tried it out, but it looks like it covers the basics pretty well.
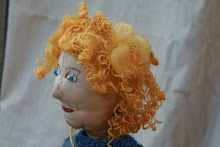
On the other hand, here's how the pattern drafting is set out in one of my favourite books. . . First, meet the author . . . the book is undated, but looks like it's published in the 1930's. Her first comment is about making sure you're wearing a good corset when you take your measurements! Perhaps that explains the slightly tense look on her face:)

Here's the page on drafting trousers:
- the page on the right shows the front and back pieces joined together. The page on the right shows the back piece only. Remember the back piece is a bit larger than the front and the pointy end of the curve is at the centre of the body.

Here's the page with the back piece drawn up. She hasn't allowed for any shaping for the hip, so the side seam is a straight line.

I have a few shorts patterns I've been using for years. So, I've had a chance to adjust them to fit the way I like. I'll use one of these patterns to demonstrate the shorts and put in some comments about choosing a ready made pattern.

I have a few shorts patterns I've been using for years. So, I've had a chance to adjust them to fit the way I like. I'll use one of these patterns to demonstrate the shorts and put in some comments about choosing a ready made pattern.

No comments:
Post a Comment